For lake owners
How to Tie a Fishing Hook: 4 Reliable Knots
2 min read

Hook knots usually fail because coils cross, dry line heats as it tightens, or a damaged section is reused. Inspect the first 20–30 cm of line and the hook eye. Cut away any rough or flattened section.
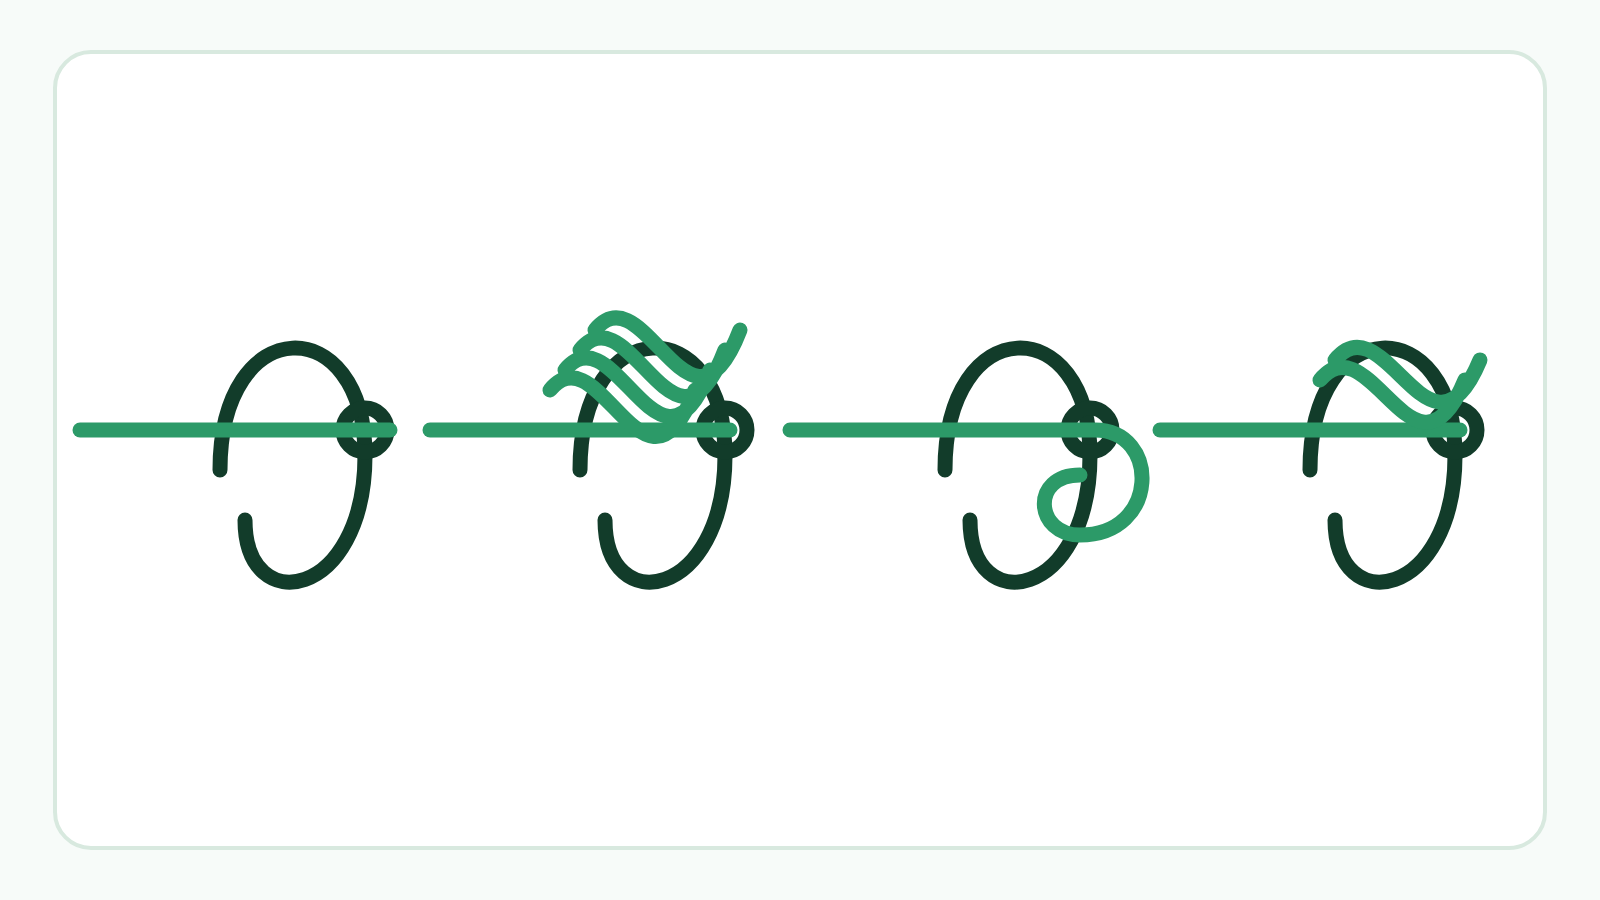
Improved clinch for an eyed hook
Pass mono or fluorocarbon through the eye, make 5–7 neat turns around the standing line, then feed the tag through the small and larger loops. Moisten and draw down slowly while arranging the coils side by side.
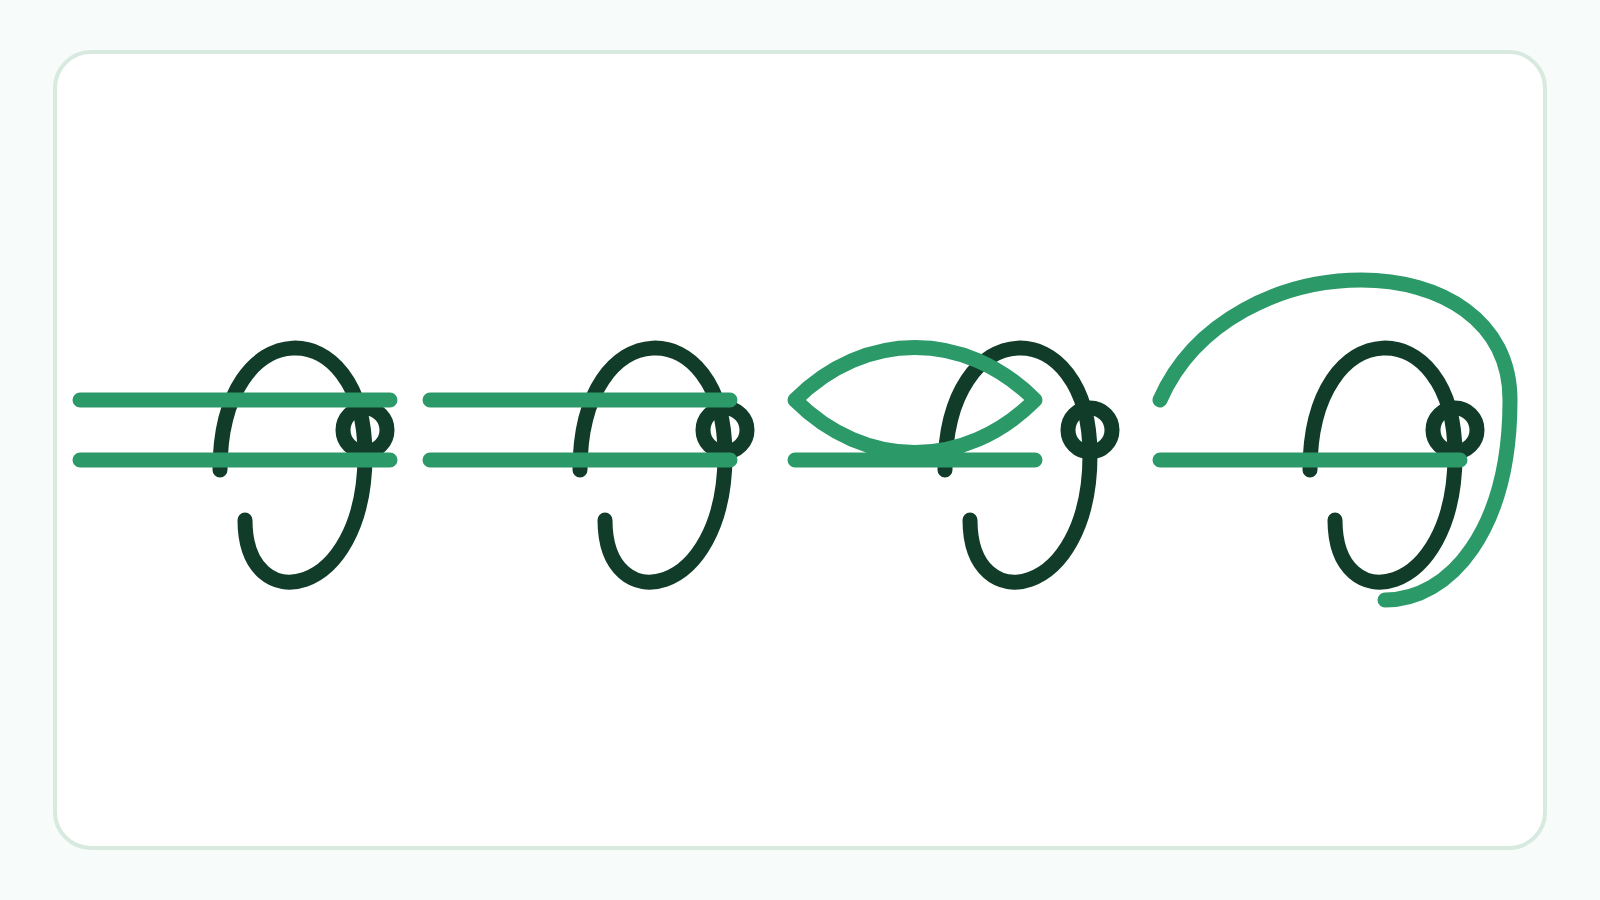
Palomar for braid
Double the line, pass the loop through the eye and tie a loose overhand knot. Take the loop over the hook, moisten and pull both parts evenly. Keep the loop away from the point.
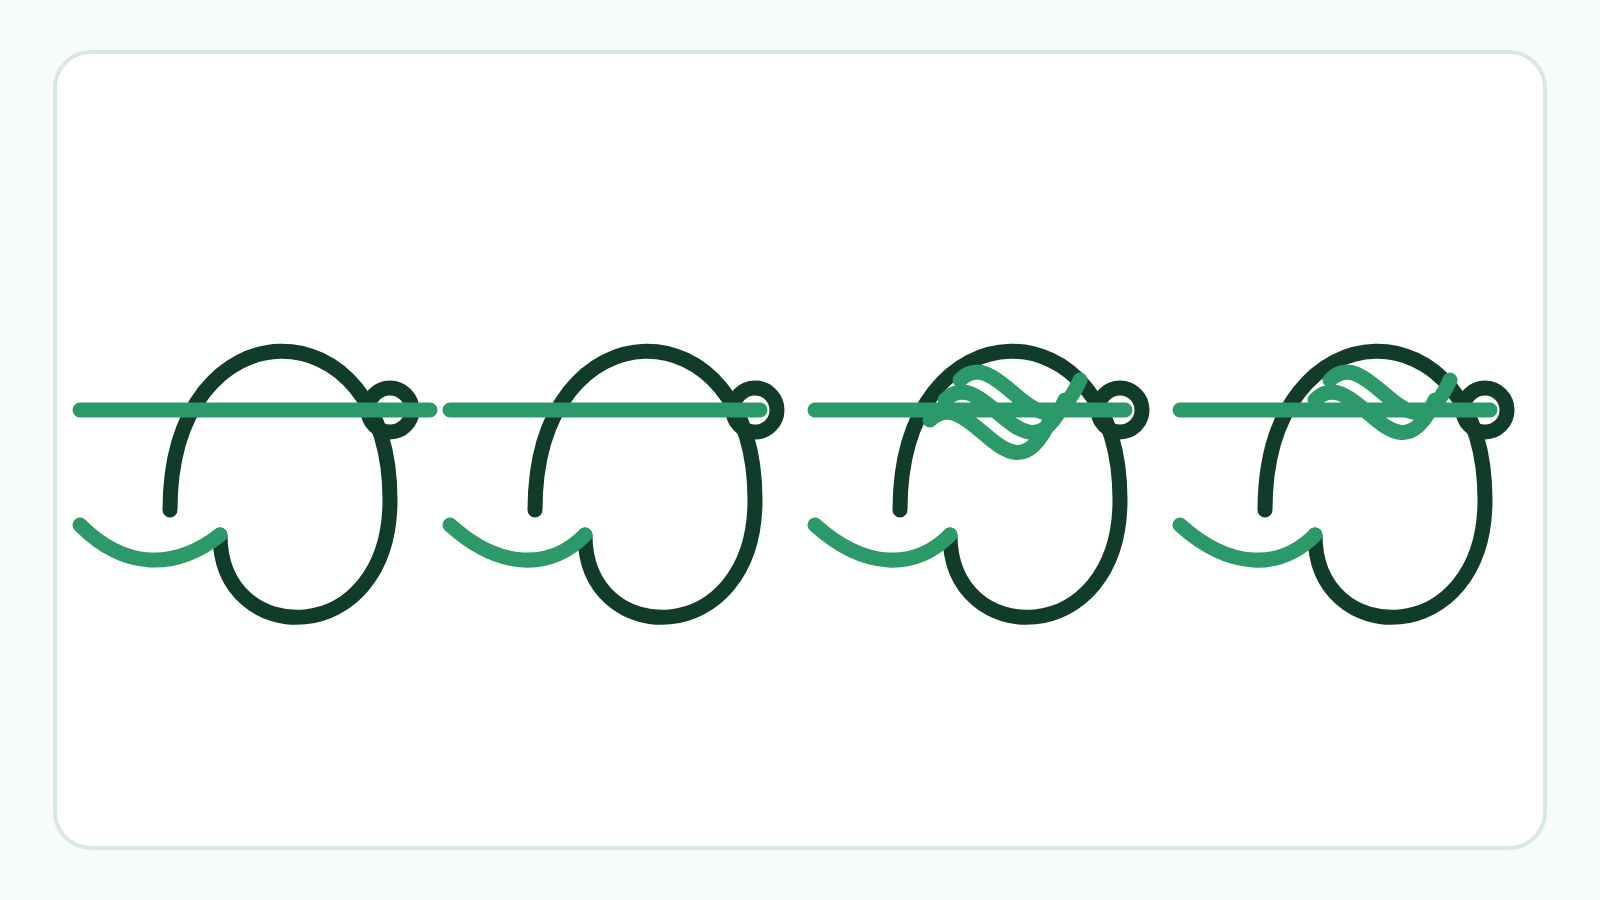
Knotless knot for a hair rig
Pass the hooklink through the eye from the point side, set the hair length and wrap closely down the shank towards the bend. Return the line through the eye from the point side. Finish before the point level.
Spade-end hook
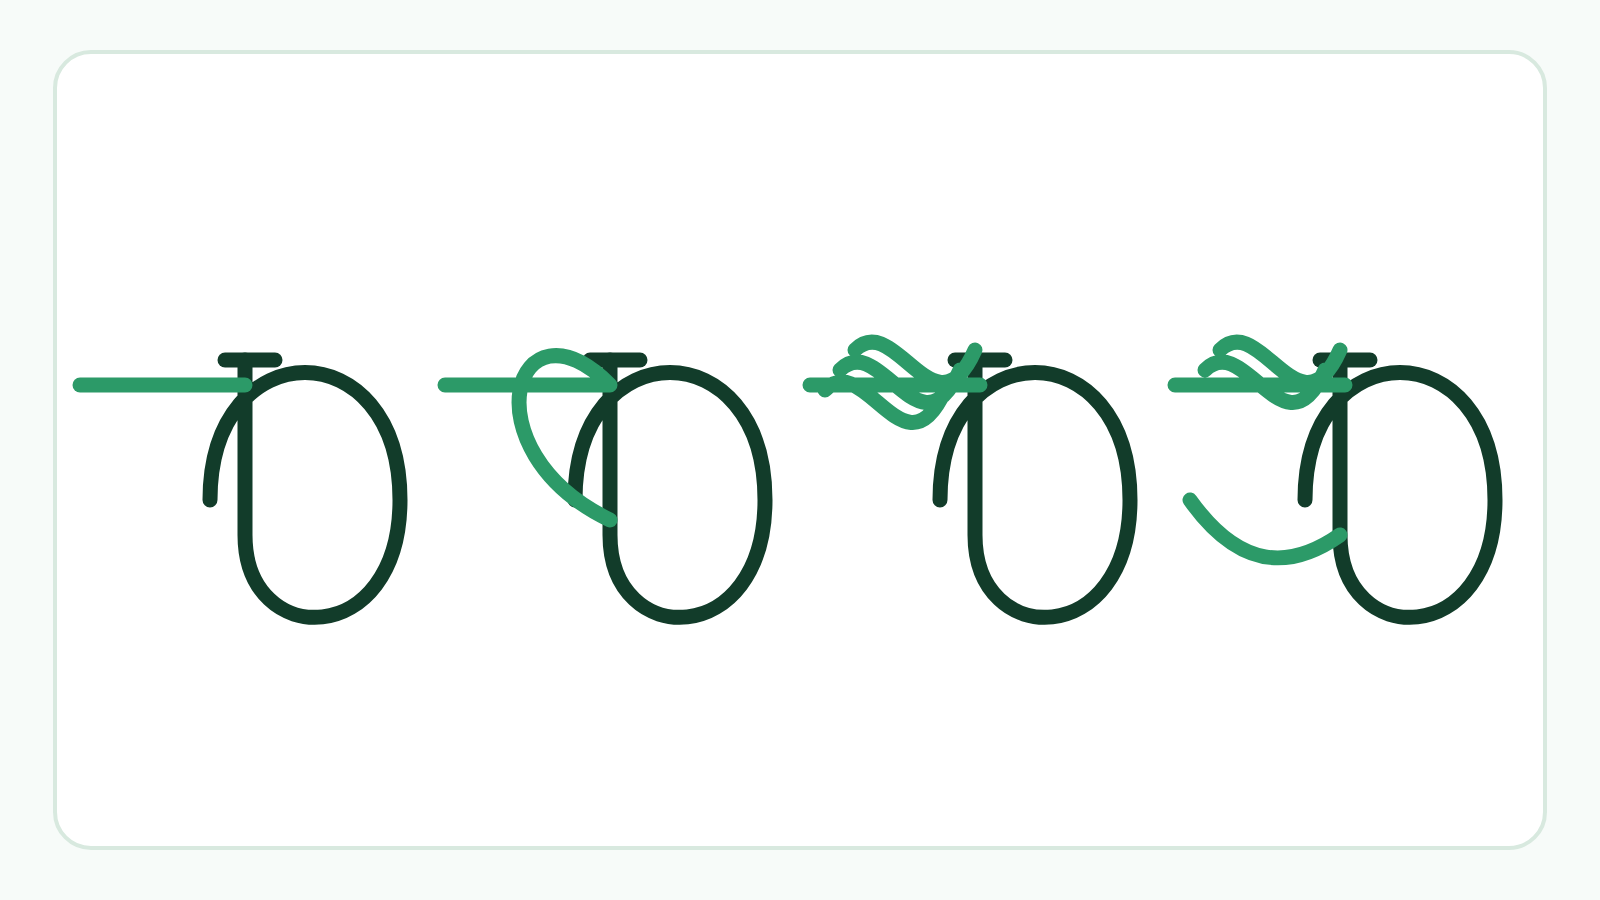
Lay the line along the shank, form a loop and wind the tag around both shank and line 6–8 times. Pass it through the loop, moisten and draw towards the spade. The line should leave on the inside of the shank.
Test before casting
Hold the hook with pliers or a safe knot tool. Leave a 2–3 mm tag and load the hooklink steadily. Retie if coils move, line turns white or the knot changes shape. Check again after a snag or large fish.
Check the venue rules
On Pegly you can browse waters, sector maps, available sessions, prices and published rules. Check barbless-hook and rig requirements before travelling.